Contents
How to create your own theme?
Many users like to add their own personal touch to the TrackThrough system and this is done in the form of themes. The systems does have predefined themes, however in this section we learn how to create our own unique theme for TrackThrough. This is simply the process of altering the visual appearance on the system.
Creating a folder for the new theme
Firstly you need to create a new folder in the resources\images directory, name the folder the name you would like to give to your theme.
e.g.: new_theme
e.g.: new_theme
Creating style.css file
Copy the file style.css from some other theme folder, e.g.: red theme folder. This can be located at, resources/images/red and into the new folder with your theme name that you have just created(new_theme). Edit the file style.css (resources\images\new_theme\style.css) and override styles you wish to alter.
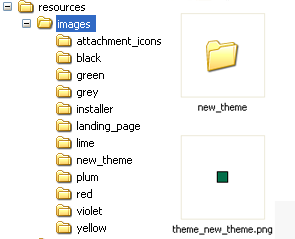
This refers to a coloured icon that identifies your theme. Create a 13x13 square icon of your choice, uses Photoshop or Gimp to do this, ensure the image file is in PNG format and should have a name similar to theme_theme_name_png.
eg: theme_new_theme.png
eg: theme_new_theme.png
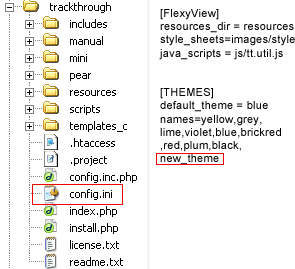
Edit the file config.ini and add your new theme name under the themes section.
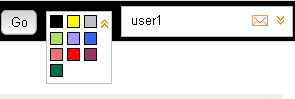
Now you can find your theme in theme pallete on menu bar.
Examples for overriding style.css file
Assume we want to change menu tab to have green background color. Locate the following in style.css and override as below.
menu a{background:#F1EEEE; color:#000000;}
to
menu a{background:#A9E35B; color:#FFFFFF; border:1px solid #A9E35B; width:78px; height:24px;}